Recently as I was scrolling on YouTube, I saw a video of Moriah Elizabeth creating pushpins out of shrink plastic. As many of you know, I love to do crafty things and I’m always on the lookout for new projects that are practical but fun. I had no need for pushpins, but I had been wanting to make some cute fridge magnets.
You can find Moriah Elizabeth’s video here. My process was very similar, with the only real change being that I attached magnets to my shrink plastic instead of pins. So, here’s how you make your very own personalized shrink plastic magnets.
Materials
The list of materials is pretty short, and you likely have some of the materials already.
- Shrink plastic
- Colored pencils, sharpies, or paint pens
- A pencil
- Scratch paper
- Scissors
- Baking Sheet
- Wax Paper/Aluminum Foil
- Hot glue & Glue Gun
- Magnets
- Mod Podge
Using Shrink Plastic
Using Shrink Plastic is super easy and honestly really fun and interesting! First, you’ll want to sketch out your designs on a scratch sheet of paper. Remember to make them quite a bit bigger than the size you want your final piece because of course, shrink plastic shrinks.
Tip 1:
Don’t draw your designs too big or with too many long standalone pieces or else it might curl in on itself when it starts shrinking and might get stuck. My magnets suffered a few casualties the first time I tried this just because of size and shape.
Once you’ve sketched out your designs, take a sheet of shrink plastic smooth side down and place it on top of your sketch. Trace your sketch onto the shrink plastic. This gives you a template to work with when coloring. I found that doing it this way was much easier than trying to freehand and fix lines on the plastic.
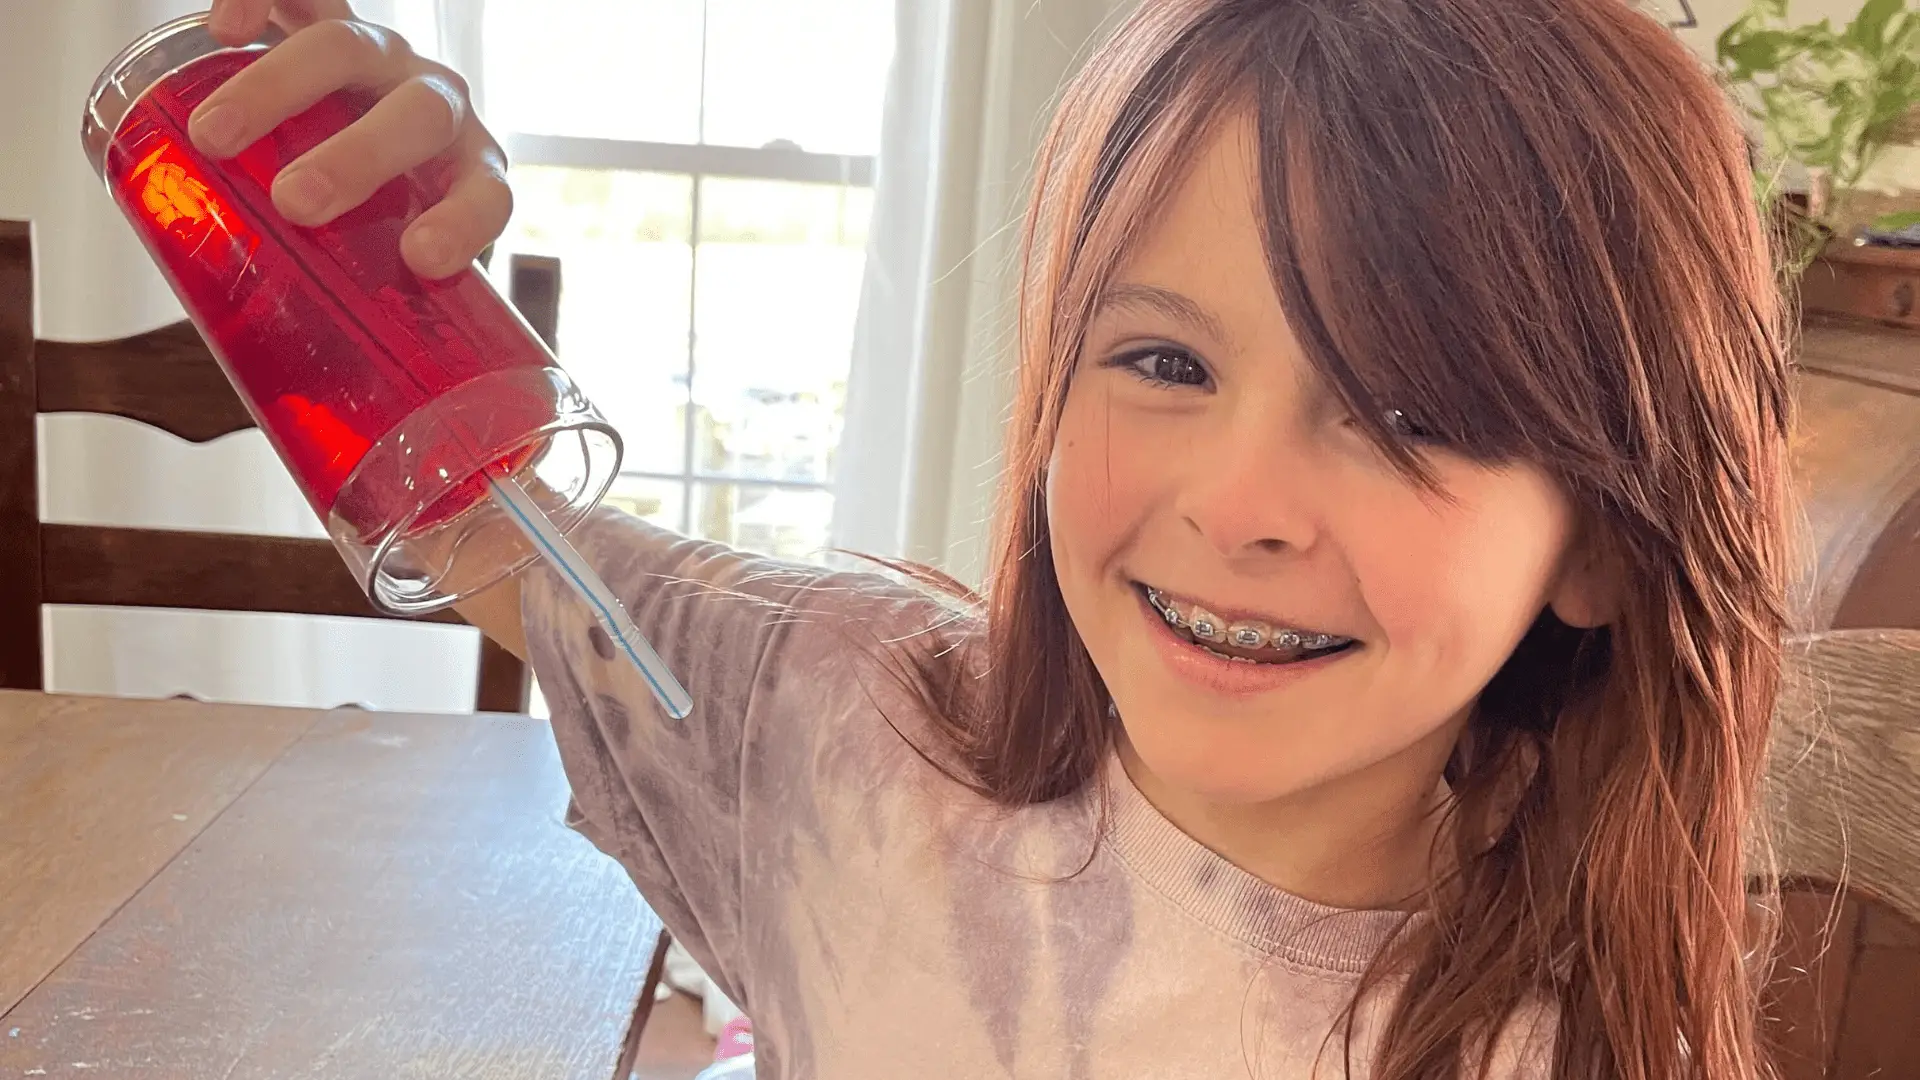
After your design is on the shrink plastic you can begin to color it in! Shrink plastic works with almost any medium you want to use except water soluble markers like Crayola markers. I did my magnets with colored pencils just because it’s what I had, and it worked really well. The colored pencils gave the magnets a cool textured look.
Tip 2:
If you use colored pencils, make sure you have a pencil sharpener with you because the rough texture of the plastic eats up your markers quickly.
Tip 3:
If you choose to use colored pencils, make sure that you’re coloring heavily enough to saturate the area in color. If not, you’ll have some random clear areas in your magnets that were meant to be opaque. This is particularly true for lighter colors where it’s more difficult to tell if you’ve colored in the whole area.
After you’ve colored in your designs, you’ll need to cut them out. The plastic is decently easy to cut through, however, it’s not paper and therefore can break or tear if you start cutting into small detailed areas. Try to cut neatly because it won’t smooth out during shrinking, it only will harden the edges.
Once you’ve cut out your shapes you can go back and fix any issues that you might have seen while cutting. For example, I always go back around the edges of mine and give them a black boarder. This is also the time to fix any areas that you want to change or color in more because once they’re shrunk there is no going back.
Now that you’ve cut out all of your shapes, you’ll want to go heat the oven to 325 degrees and let it preheat. While you’re waiting for it to preheat you can prep your baking sheet. You’ll want a baking sheet that your plastic fits on comfortably. You don’t want it to hang off the edges because it might flip over and fall off and then you’ve got a mess on your hands. Place a piece of aluminum foil on the baking sheet just to make sure nothing gets melted or stuck to your baking sheet.
When the oven has finished preheating, place your shrink plastic on the baking sheet and put it in the oven. Turn on the oven light so you can watch your creation shrink. It’s honestly really interesting to watch even for a grown up. Your designs will move and twist as it begins to shrink down but don’t worry, 9 times out of 10 they lay out flat again on their own.
Tip 4:
I’d suggest that you only shrink 1 piece at a time because if you shrink too many at once they’ll likely flop over on top of each other and get stuck together. Trust me you don’t want to have to pry them apart because that plastic is H-O-T.
Tip 5:
If by chance one does curl up and doesn’t look like it’s going to flatten back out, you can quickly and carefully open the oven take a spatula and push the edges back down so it will begin to flatten.
Once your plastic has stopped shrinking and is lying flat, take the baking sheet out of the oven and let the plastic sit for about a minute to cool. Then you can remove it from the backing sheet and start the process over for the next batch.
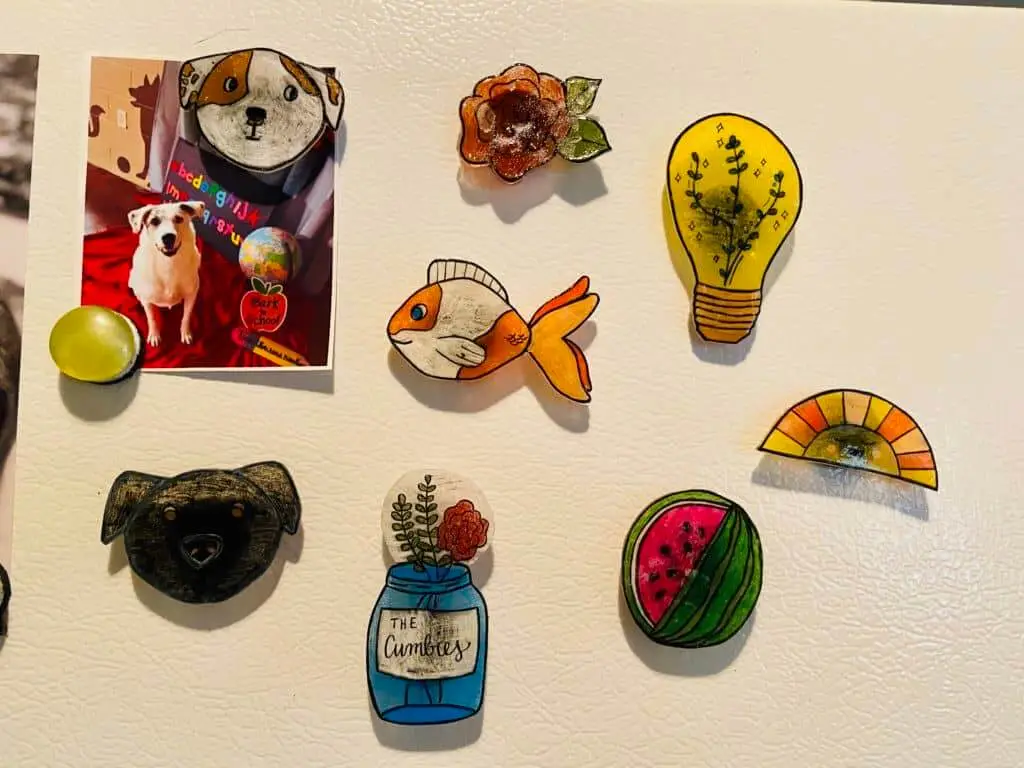
After everything has been shrunk, you can then put a protective coat on top of them (I use mod podge) to help keep the colors crisp as long as possible. The next step is to take a dab of hot glue and attach your magnet to the back of the plastic after the clear coat has dried and TA-DA you’ve got your very own shrink plastic magnet!
Here are two that I made of our friend’s dogs June and Kona!

This project takes a bit of time but is super fun for the crafty people out there and would definitely be a fun thing to do with your kiddos. If you try it out, send us a picture on the Dogwood Journal Social Media and let us see what kind of cool ideas you come up with.
There are no affiliate links in this post and no compensation was received for writing this.
If you have a story or blog that you’d like to submit, send it our way!